
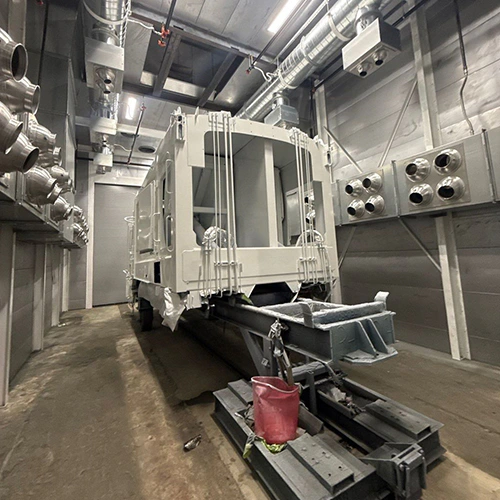
Abrasive consumption rarely spikes because of a single catastrophic failure. Instead, media bleeds out of a blast room through misclassified waste streams: shattered particles pulled into the dust collector prematurely, pounds of usable grit tracked out on fork pockets, uncalibrated air washes dumping round media into waste drums, and over-blasting driven by worn nozzles.
Cutting media costs requires locating where usable media exits your loop and isolating variables without altering your qualified surface finish.
Media Balance: Opening Usable Inventory + New Additions = Closing Usable Inventory + Measured Discards / Losses
Use consistent boundaries and account for material stranded in equipment or parts.
When production managers treat consumption as an aggregate facility expense rather than an audited process input, abrasive usage drifts upward. Regaining control demands an operational balance sheet for media, targeted baseline runs on identical part families, and strict, one-variable-at-a-time trials.
Establish Consumption per Accepted Job Family
Normalized metrics like "pounds of abrasive per square foot" fail when applied universally across a job shop. Blasting a flat, mill-scale plate to an SSPC-SP 10 (Near-White Blast) requires an entirely different volume of abrasive than removing heavy multi-layer polyurethane from an intricately webbed casting. Comparing these jobs against a single shop-wide average obscures real media waste.
To establish an actionable baseline, group your production schedule into distinct part families based on three criteria:
- Substrate and Geometry: Open planar surfaces, shielded weldments with deep cavities, or heavy cast structures.
- Coating and Contaminant Profile: Light rust and mill scale, brittle heat-treat scale, heavy rubberized linings, or oil-soaked surfaces.
- Required Surface Specification: Target surface profile (anchor pattern depth in mils/microns) and degree of cleanliness (e.g., NACE No. 2/SSPC-SP 10 vs. NACE No. 3/SSPC-SP 6).
Baseline Consumption: Compare additions, inventory change, rejects, and accepted output for like jobs.
Use comparable inventory states and consistent mass measurements for opening inventory, additions, closing usable inventory, and discarded material. Include stranded material in recovery equipment or parts rather than infer loss from hopper level alone. Normalize against inspected, accepted output.
If comparable jobs show different consumption across shifts, investigate technique, incoming condition, media, equipment, recovery, and measurement practices. A percentage difference alone does not prove an operator or equipment cause.
Distinguish the Five Media-Loss Paths
Media does not simply disappear; it exits the process through five distinct routes. Sweeping up floor grit and dumping it into the reclamation hopper does not fix high consumption if half that volume is unusable dust or oil-contaminated waste.
| Media-Waste Contributor | Evidence to Track |
|---|---|
| Attrition / Fines | Product breakdown and rejected material |
| Stranded Inventory | Floors, equipment, and part pockets |
| Carry-Out / Leaks | Handling and containment losses |
| Contamination | Rejected mix and source investigation |
| Unnecessary Work / Rework | Additional use and cycle cost; not a separate mass stream |
To diagnose media loss, track each path independently:
1. Natural Attrition and Dust Collection Fines
Every impact fractures a percentage of the abrasive grains. Hard, brittle media like aluminum oxide break down along crystalline planes; ductile media like steel shot round off and deform until micro-fracturing turns them into sub-mesh dust.
Review collected rejects under an approved safe sampling procedure. Whole grains may indicate separation losses, contamination, unsuitable media, or another issue; do not return waste to the process without determining suitability. See how dust and debris are managed for the system functions.
2. Stranded Inventory in the Booth
Material may remain in floors, recovery equipment, or part pockets. Use an approved removal and inspection process to limit carry-out without dispersing dust or damaging the part.
Stranded media skews inventory audits, leading supervisors to add fresh bags to the blast pot under the mistaken belief that the system has lost working volume.
3. Escape and Spillage
Media escapes through worn door seals, degraded vestibule curtains, unsealed floor expansion joints, and tracking on operator boots or forklift tires.
Even minor negative-pressure deficits in the enclosure allow fine abrasive to plume past entry curtains into surrounding plant space. Any grit visible outside the booth perimeter represents a dead physical and environmental loss.
4. Batch Contamination
Moisture, oil, or removed material can impair flow or contaminate the mix. Verify the approved air quality, pre-cleaning, and media acceptance; neither a solvent wash nor complete batch disposal is universally required.
Guidelines covering storage, handling, and shelf-life variables for varied materials can be explored through specific recommendations on abrasives for different applications.
5. Over-Blasting and Rework
Dumping excessive media onto a substrate after it has reached the target surface cleanliness does not improve adhesion; it increases media attrition, rounds off hard-edged profiles, and accelerates nozzle wear.
Rework caused by missed shadows, improper profile depth, or oil flash-rusting forces a second full consumption cycle for a single part.
| Loss Route | Diagnostic Check | Immediate Corrective Action |
|---|---|---|
| Collector Waste | Qualified review of rejected material and separation performance. | Investigate suitability and system conditions before any approved correction. |
| Stranded Media | Record remaining material in parts and recovery areas. | Use an approved contained removal/handling procedure. |
| Enclosure Escape | Assess openings, seals, airflow, handling, and carry-out. | Qualified containment diagnosis and correction. |
| Contamination | Assess air, incoming parts, media, and process history. | Address the verified source and determine media suitability. |
| Over-Blasting | Compare qualified process conditions and accepted outcomes. | Test authorized changes within the job’s limits; no universal angles. |
Check the Media and Recovery Match
A blast room's recovery floor and reclamation unit must match the physical characteristics of the media running through it. Mechanical recovery systems, such as screw conveyors and bucket elevators, handle heavy, dense media like steel shot and grit at high transfer volumes. Pneumatic recovery floors rely on vacuum air movement, making them sensitive to bulk density, particle size, and media weight.
Clemco’s blast-room system guidance offers media-specific recovery and flexible configurations. Verify the actual system’s density, size, transport, and separation envelope. An unsuitable mix can cause loss or poor flow, but neither media family nor a few cycles predicts one inevitable failure.
When auditing the reclaim system, verify:
- Air-Wash Damper Position: The air curtain inside the separator must pull off shattered fines, scale, and rust particles without lifting the smallest usable working grains. Check this balance each time you switch mesh sizes.
- Vibratory and Rotary Screen Integrity: Sieve screens remove oversized trash, weld spatter, and paint chips before the media drops into the pressure vessel. A torn screen passes debris into the metering valve, causing clogs and erratic feed rates that prompt operators to blast longer.
- Bulk Handling Specifications: If you plan to transition between coarse mineral slags, ceramic beads, or cast steel media, verify that your recovery floor, elevator buckets, and separator fans support that density. Review the mechanical limits across different sandblasting booth options before changing media densities.
Evaluate Settings and Technique Through Approved Trials
Changing blasting parameters without an approved test protocol introduces process noise and risks surface non-conformance. Never allow operators to adjust pot pressures, change media types, or swap nozzle profiles arbitrarily to chase speed.
Clemco’s Models 1028 and 1042 manual notes model-specific air demand, nozzle wear, and media limits. A worn nozzle can increase demand, but pressure and consumption also depend on delivery, other users, and operating conditions.
Wear/Performance Review: Nozzle condition can alter demand and delivery; assess it with supply, process, and recovery data before diagnosing the consumption trend.
When evaluating setup changes, test one variable at a time using this structured approach:
1. Lock Out Extraneous Variables
Keep relevant job variables comparable and have authorized personnel document nozzle condition against the actual manufacturer limits. Use model-specific data for wear and air demand rather than one universal percentage. Review media and filter replacement when component or media condition changes.
2. Verify Air Supply and Pressure at the Nozzle
Have qualified personnel verify delivered flow and operating pressure using the actual equipment manufacturer’s approved methods. Compressor or pot readings alone may not describe conditions at the nozzle; this review does not authorize improvised live pressure testing.
Investigate measured losses across supply and delivery components. Keep any proposed pressure change within equipment and qualified process limits, then verify quality, media use, and total-cycle effects.
3. Standardize Blast Technique
Operator technique dictates how efficiently media energy transfers to the workpiece:
- Stand-Off Distance: Use the qualified job range and assess its coverage, removal, and substrate effects; one distance does not suit every part or nozzle.
- Angle of Attack: Evaluate angle with grade, flow, pressure, geometry, and dwell in an approved trial. No universal angle prevents fracture or embedment.
Safety Note: Trials must operate strictly within plant safety procedures. Never bypass system interlocks, alter breathing-air pressure systems, or modify pressurized vessels during test runs. Lockout/tagout, vessel depressurization, and respiratory protection protocols must be executed by qualified personnel.
Track Results Before Making Changes Permanent
A process tweak that reduces bag consumption by 15% is a failure if it adds 30 minutes of labor per part or causes coating delamination in the paint booth. You must evaluate media efficiency alongside labor hours, cycle times, cleanup durations, and quality assurance data.
Use a structured trial record to compare baseline production against your experimental variables:
| Trial Record | Baseline and Authorized Trial Evidence |
|---|---|
| Part Family & Batch | Record comparable geometry, incoming condition, and accepted output. |
| Media / Equipment | Record product grade, working mix, approved machine/nozzle, and component condition. |
| Operating Conditions | Document the qualified delivery and process conditions and the specific authorized change. |
| Media Balance | Record opening/closing usable inventory, additions, rejects, and carry-out on a consistent basis. |
| Whole-Cycle Labor | Include blasting, handling, cleaning, inspection, and maintenance attributable to the trial. |
| Quality Acceptance | Record specified cleanliness/profile, substrate integrity, contamination, and rework. |
| Decision | Compare cost per accepted output; retain unresolved issues before adopting a change. |
A lower-media trial may still cost more if it slows the cycle, increases handling, or adds rework. Compare all measured costs rather than assume that fewer bags prove improvement.
Correcting a verified component or separation fault may improve performance. Record the actual result; replacing a nozzle or adjusting a separator does not guarantee lower media use and labor.
Adopt process changes permanently only when the trial demonstrates lower consumption without shifting costs downstream into painting rework, extended labor shifts, or rejected anchor profiles.
Next Steps for Facility Optimization
If your abrasive consumption remains high despite verified nozzle geometry, correct air-wash settings, and trained operator technique, your blast enclosure or recovery configuration may be poorly matched to your throughput.
To evaluate whether your recovery floor, separator capacity, or dust collection infrastructure matches your production volume:
- Document your dominant part dimensions, weights, and handling requirements.
- Record your current abrasive type, mesh size, and weekly bag consumption.
- Note your available compressed air capacity (actual CFM delivered at pressure).
- Detail your target coating removal challenges and required SSPC/NACE surface profiles.
With these operational details gathered, contact our engineering team to review your recovery dynamics or request a sandblasting booth quote tailored to your facility's production demands.