
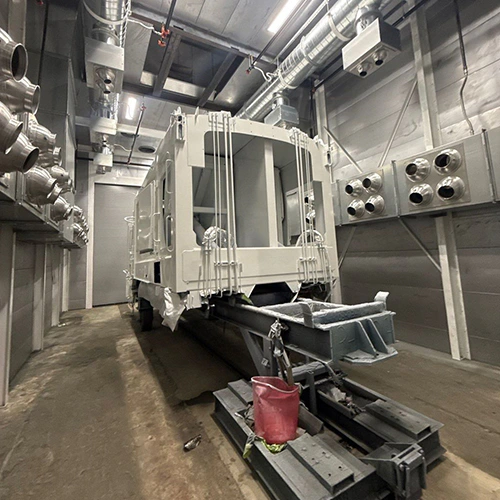
The spray booth is an application zone, not a cleaning bay or body staging area. Rolling a partially prepared vehicle into the cabin degrades booth airflow, loads filters with shop debris, and introduces contaminants that ruin paint finishes. High-efficiency paint booths are engineered to evacuate atomized overspray and control climate, not to compensate for incomplete surface abrasion, contaminated panel gaps, or unsuitable masking tape.
Achieving repeatable paint results requires a strict boundary between prep stall work and booth entry. A disciplined handoff process ensures that substrate identity, cleaning steps, masking tolerances, and application parameters are fully verified before the vehicle crosses the threshold.
Identify the Repair Surface and Coating System
Refinish preparation begins with substrate classification. Modern vehicles rarely present a single uniform surface across a repair area. A front-end collision repair may involve raw replacement plastics, electrocoat (E-coat) replacement panels, feathered OEM factory clearcoat, and cured polyester body filler across adjacent sections. A blanket preparation technique can be unsuitable for these different materials; verify the procedure for each repair surface.
| Substrate Type | Surface Characteristics | Core Verification Focus |
|---|---|---|
| OEM E-Coat (New Panel) | Uniform, thin protective primer applied via electrodeposition | Film integrity, edge coverage, solvent resistance, non-break-through scuff profile |
| Bare Metal (Steel / Aluminum) | Highly reactive exposed alloy; susceptible to flash oxidation | Oxidation removal, alloy-appropriate profile, immediate primer timing |
| Raw or Primed Plastics | Low surface energy, flexible, sensitive to solvent swelling | Plastic type identification (PP, TPO, ABS), mold-release removal, static neutralization |
| Existing Factory Clear | Fully cross-linked polyurethane or acrylic enamel | Complete mechanical de-glossing into panel breaks and character lines |
| Cured Repair Filler / Surfacer | Porous, high-solids intermediate repair layers | Complete solvent evaporation, uniform feather edges, pinhole elimination |
Do not rely on a generic sanding sequence. A preparation method suitable for one substrate may be inappropriate for an adjacent blend area. Prep technicians must consult specific vehicle preparation guidance alongside technical data sheets (TDS) from the coating manufacturer to match abrasive grades, primer chemistries, and film-build targets to the part being treated. Verify whether replacement plastics are delivered with conductive primers or require mechanical abrading with specialized cleaning pastes. This process documentation must travel with the repair order into the booth.
Complete Cleaning and Surface Preparation in the Prep Stall
All aggressive abrasion, edge feathering, panel blow-out, and initial degreasing must finish before opening the booth doors. Carrying shop dust, guide-coat powder, or residual compound on wheel arches and rocker panels into the spray cabin contaminates both the current job and future cycles.
Contamination on the vehicle body is one possible source of post-spray defects. Silicone residue from interior dressings, oil from unwashed technician hands, and grease trapped in door latches will migrate onto the prepared surface during spraying. Standard fisheye defect guidance demonstrates that crater-like surface disruptions often stem directly from airborne or contact silicones introduced during inadequate prep-stage cleaning, rather than faults in the booth's air supply.
Cleaning and Contaminant Management Protocol
- Complete the Approved Cleaning Process Outside the Booth: Select cleaners and wiping methods from the coating, substrate and vehicle instructions. Document completion without assuming every surface requires the same waterborne and solventborne sequence.
- Check Trapped Cavities: Identify panel gaps and cavities that may retain moisture, dust or sanding residue. Resolve them using the approved preparation procedure before handoff.
- Inspect the Feather Edges and Transition Zones: Examine all repair boundaries under dedicated high-CRI inspection lighting. Check for soft edges, grit scratches showing through primer surfacer, or unsanded gloss in reverse corners and panel recesses.
- Check Wheel Wells and Underbody Assemblies: Review exposed lower areas for dirt or residues that could enter the paint zone. Complete the appropriate cleaning or masking before staging.
Once final sanding, panel blowing, and primary degreasing are complete, clean tools and handling protocols become non-negotiable. Use clean handling practices and gloves suitable for the products and task to reduce contaminant transfer; confirm protective requirements from the applicable safety information.
Check Masking, Openings, and Thermal Readiness
Masking defines paint boundaries and helps isolate areas that should remain unpainted; it is not a substitute for completed preparation. A common failure mode occurs when standard masking paper or low-temperature tapes break down under booth bake cycles, transferring adhesive to panels or disintegrating into airborne fiber.
Masking materials must match the operational parameters of automotive paint booths, particularly when running high-temperature bake or curing cycles. High-velocity airflow will lift loose tape edges, driving overspray into cabin interiors or fluttering unanchored plastic against wet clearcoat.
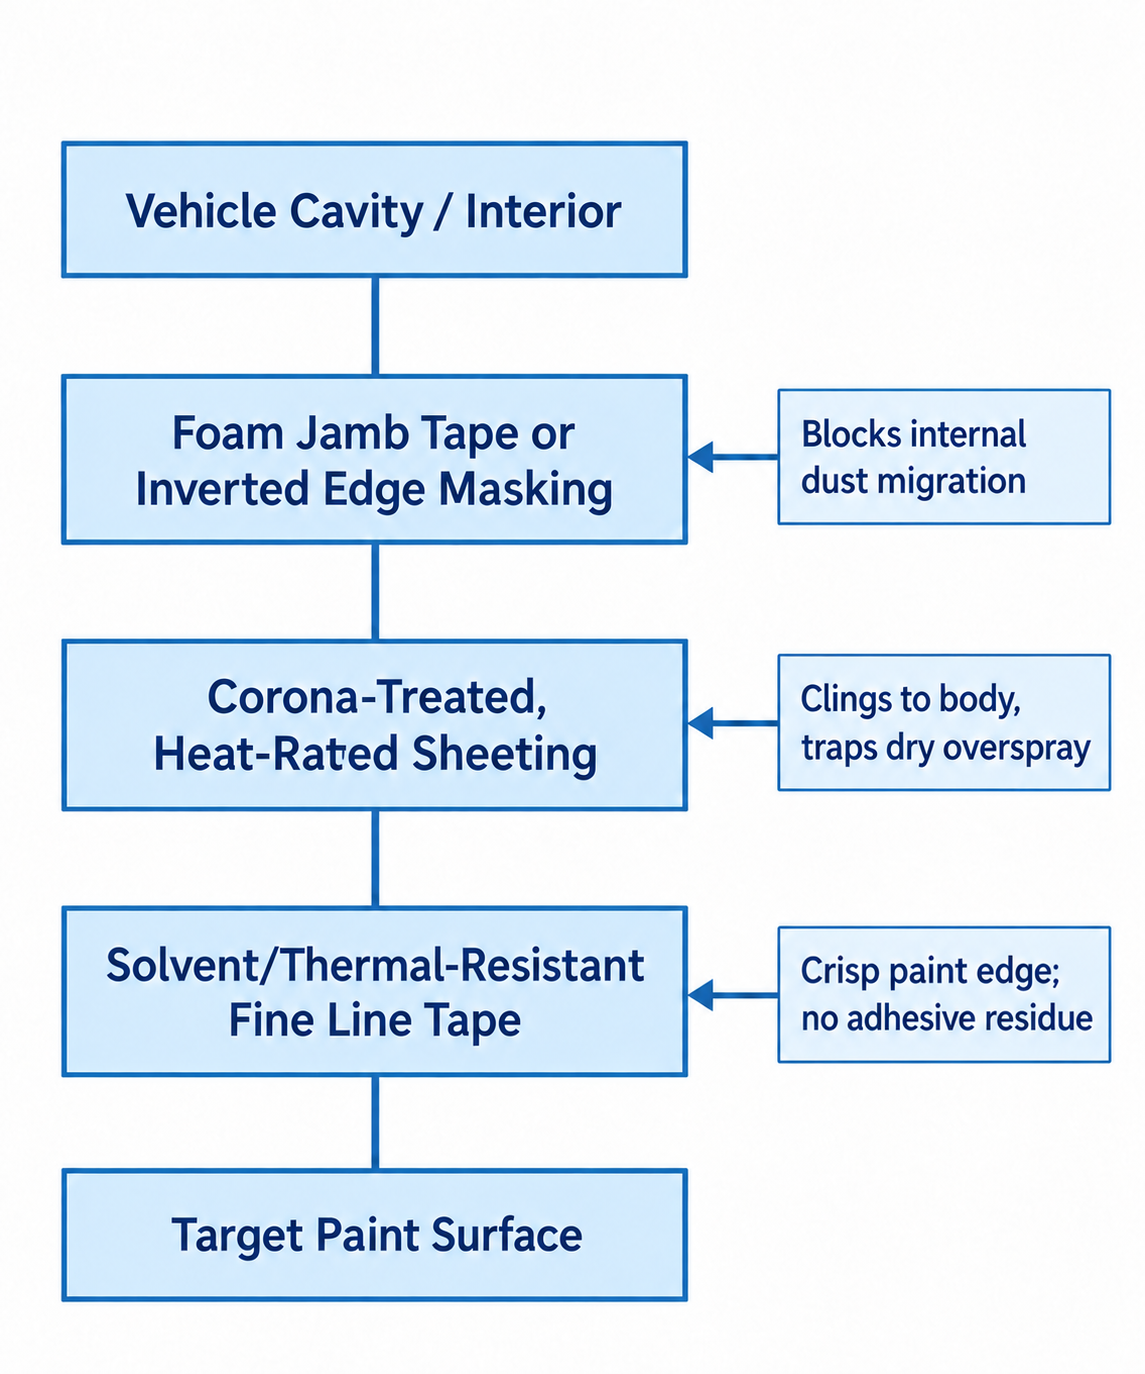
Diagram description
- Vehicle Cavity / Interior
- Foam Jamb Tape or Inverted Edge Masking
- Blocks internal dust migration
- Corona-Treated, Heat-Rated Sheeting
- Clings to body, traps dry overspray
- Solvent/Thermal-Resistant Fine Line Tape
- Crisp paint edge; no adhesive residue
- Target Paint Surface
- Vehicle Cavity / Interior → Foam Jamb Tape or Inverted Edge Masking: unheaded
- Foam Jamb Tape or Inverted Edge Masking → Corona-Treated, Heat-Rated Sheeting: unheaded
- Corona-Treated, Heat-Rated Sheeting → Solvent/Thermal-Resistant Fine Line Tape: unheaded
- Solvent/Thermal-Resistant Fine Line Tape → Target Paint Surface: unheaded
- Blocks internal dust migration → Foam Jamb Tape or Inverted Edge Masking: leftward annotation
- Clings to body, traps dry overspray → Corona-Treated, Heat-Rated Sheeting: leftward annotation
- Crisp paint edge; no adhesive residue → Solvent/Thermal-Resistant Fine Line Tape: leftward annotation
- Vertical unheaded connector from Vehicle Cavity / Interior through three stacked masking boxes to Target Paint Surface.
- Each right-side qualifier has left-pointing arrow into its corresponding box: Foam Jamb Tape or Inverted Edge Masking ← Blocks internal dust migration; Corona-Treated, Heat-Rated Sheeting ← Clings to body, traps dry overspray; Solvent/Thermal-Resistant Fine Line Tape ← Crisp paint edge; no adhesive residue.
Pre-Entry Masking Inspection
- Thermal and Chemical Ratings: Ensure all masking films and tapes can withstand the planned cabin drying temperature without bleeding adhesive into moldings. Verify the selected sheeting’s intended use, overspray retention and operating-temperature suitability.
- Jamb and Aperture Sealing: Check jamb and opening protection against the repair plan and masking-product instructions; the required edge treatment depends on the application.
- Clearance of Critical Air Passages: Confirm that masking does not cover the vehicle's exhaust tailpipe if the vehicle must be driven into the cabin, or obstruct booth pit grates and intake plenums when positioned. Secure all plastic aprons tightly to wheels and undercarriage components so high downdraft velocities cannot lift them into the paint path.
- Border Sharpness and Cutback: Inspect all reverse masking along body style lines. Ensure fine-line tapes are fully seated into seams without bridging across gaps, which permits under-edge overspray bleed.
Align Coating Conditions with Technical Specifications
A well-prepared surface can still yield poor results if coating chemistry, ambient shop conditions, and application timing fall out of alignment. Refinish coatings require specific ambient and substrate temperatures to atomize, flow, flash, and cross-link correctly.
Surface texture problems often begin with incorrect component mixing or temperature mismatches before the painter pulls the trigger. As detailed in industry orange peel guidance, excessive surface texture typically traces back to improper reducer selection for current shop temperatures, incorrect spray viscosity, or rapid surface flash-off that prevents proper leveling. These are chemical and thermal variables that must be accounted for during the prep-to-paint handoff.
Technicians must verify that the vehicle body has stabilized at ambient booth temperature before spraying commences. A cold surface can collect condensation when below the surrounding air’s dew point. A hot surface can also alter application and solvent evaporation. Verify the actual substrate condition against the coating instructions before release.
Review the coating TDS for:
- Any required drying or waiting periods after cleaning and before application.
- Compatible hardeners and reducers selected specifically for the real-time booth operating temperature.
- Required induction times for mixed epoxy or urethane primers.
Should surface irregularities, texture variations, or contamination appear after application, reference a separate paint finish diagnosis resource to isolate chemical defects from mechanical application errors.
Execute the Pre-Entry Handoff
The handoff from prep stall to painter must be formalized through a physical or digital pre-entry record. This documentation eliminates assumptions about what has been sanded, what products have been applied, and how the vehicle must be handled in the cabin.
PRE-ENTRY HANDOFF GATE
- REPAIR IDENTITY: RO-7842 | Panel: LF Fender, Hood
- ☑ Substrates Mapped: Bare Alum / E-Coat / Clear
- ☑ Cleaning: Product-Approved Process Complete
- ☑ Cavities: Residue and Moisture Check Complete
- ☑ Masking: Product and Repair Suitability Verified
- ☑ Substrate Temp Equalized to Cabin Target
- ☑ TDS Matched: Hardener / Reducer Formulated
- HOLD POINTS: None. Surface Cleared for Final Tack
- Prep Tech Signoff: J. Miller | Time: 09:15 AM
- Painter Acceptance: D. Vance | Time: 09:22 AM
The pre-entry checklist confirms:
- Substrate Mapping: Exact identification of all raw, primed, and feathered substrates present on the vehicle.
- Product Formulations: Specific primer surfacers, sealers, and plastic adhesion promoters already applied, along with their batch or TDS reference numbers.
- Bake Cycle Constraints: Clear identification of temperature-sensitive components on the vehicle (e.g., radar sensors, specialized electronics, interior trims) that dictate maximum cure cycle profiles.
- Hold Points: Explicit notes detailing any area left intentionally unprepared for subsequent blending, spot repairs, or secondary masking steps.
Vehicle readiness is distinct from cabin readiness. Loaded filters, damaged media or abnormal cabin-pressure conditions can affect booth performance even when the vehicle preparation is complete. Prep teams and painters must confirm booth operating parameters against a dedicated paint booth maintenance checklist in parallel with the vehicle handoff.
Booth Equipment Support and Component Replacement
Maintaining clean transitions from prep stalls to spray booths depends on properly operating mechanical barriers, clean air delivery, and dependable cabin hardware. For equipment or component inquiries, provide the booth identity and the installed configuration so compatibility can be reviewed.
If you are upgrading your prep stations, updating intake and exhaust filtration arrays, or reviewing worn booth door gaskets, submit your current setup details through Request a Quote. Provide your booth manufacturer, internal cabin dimensions, airflow style (crossdraft, semi-downdraft, or full downdraft), and current operational challenges to identify matching replacement components.