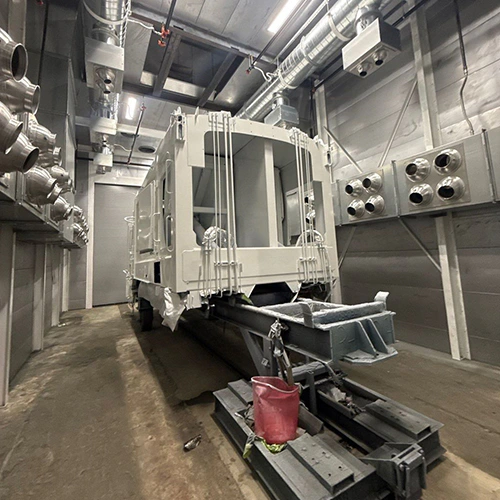
A paint booth is not just a room with fans and filters. It is a controlled environment that protects finish quality, keeps operators safer, reduces fire risk, and helps your equipment last longer. The challenge is that paint booth problems often start small . A filter loads up slowly. A belt loosens over weeks. A door seal cracks, then overspray starts sneaking into places it should not be. By the time you notice defects on the surface or airflow drops enough to feel it, you are already losing time, materials, and consistency.
That is why a maintenance checklist is so valuable . It turns “we should check that” into a routine that is repeatable, trackable, and easy to train. The goal is not to create paperwork. The goal is to make good work the default. Today we will discuss how to build a checklist your staff will actually use, without turning it into a giant binder. We will keep the structure simple, focus on the items that matter most, and set it up so you can improve it over time.
Step 1: Start with what you are trying to protect
Before writing tasks, define what your checklist is protecting. This keeps the list from becoming random and helps your team understand why each step matters. For most paint booths, the maintenance checklist should protect four things:
Write these four goals at the top of your checklist document. It sounds simple, but it changes how your staff treats the list. They see it as protecting the work, not as a chore.
Step 2: Break the checklist into time blocks that match real work
The best maintenance checklists follow how people actually work. Paint booth maintenance should be separated by frequency, not by equipment type alone. A practical structure is:
If your booth runs multiple shifts, add a “per shift” section for basic checks like housekeeping, airflow observations, and safety walkarounds. The key is to keep each block short enough that it does not get skipped. Also decide who owns each block. Daily items usually belong to operators. Weekly and monthly items may belong to a lead, maintenance technician, or supervisor. Quarterly items may require a trained technician or your service partner.
Step 3: Pull your first draft from three reliable sources
To create a checklist that fits your booth, do not rely on memory alone. Use these sources:
Once you gather these inputs, you are ready to write tasks in a clear, staff friendly way.
Step 4: Write checklist items that are clear, measurable, and easy to train
A checklist fails when it includes vague instructions like “check filters” or “inspect booth.” Instead, each line should tell the user what to look at and what “good” looks like.
Use this simple format for every item:
Action + location + pass/fail clue + what to do if it fails
Examples that work well:
Notice how each task includes a specific indicator. If you do not have gauges or placards, add them. A small sign listing the acceptable range for airflow or pressure makes the checklist far more effective. Also keep the language consistent. Use the same verbs repeatedly: verify, inspect, clean, replace, record. Consistency reduces training time and confusion.
Step 5: Decide what needs a reading, what needs a look, and what needs a tool
Not every check is visual. Your checklist should include three types of tasks:
Visual checks: These are fast and cover leaks, damage, dirt, clogged areas, and obvious wear.
Read and record checks: These include pressure readings, temperature readings, cure oven setpoints, and run hours. Recording data helps you spot trends before failures happen.
Hands on checks: These include belt tension checks, lubrication, damper function tests, and cleaning behind panels. These should be assigned to trained staff only.
On the checklist, label tasks with a simple icon or letter, such as V for visual, R for read and record, and H for hands on. This prevents new staff from attempting tasks that require training, and it speeds up daily routines.
Step 6: Keep the main headings, but limit the list length
You asked for a checklist approach without too many headings and points. That is smart. Too many sections create clutter and reduce compliance. Aim for 3 to 5 main headings max, then group tasks by frequency under each.
A clean structure for your final document could look like this:
Within each section, keep the number of items reasonable. As a rule of thumb:
If you go beyond that, you may be mixing “nice to do” tasks with “must do” tasks. Put extra items into a separate “improvement list” rather than the checklist.
Step 7: Add ownership, timing, and sign off so it actually gets done
A checklist is only as good as the system around it. Add these simple control fields at the top of each section:
For each item, include a pass/fail box and a notes line. Notes matter because they turn a checklist into a communication tool. If someone writes “pressure trending high” or “door seal worn lower right,” maintenance can act before defects appear.
If you are using paper, keep the form on a clipboard in a consistent place near the booth entrance. If you are using digital forms, make sure it is fast to open and does not require ten clicks.
Step 8: Build a simple escalation plan for problems
Many teams do checks but still struggle because no one knows what to do when an item fails. Add a short “If something is not OK” section at the bottom:
This reduces guessing and makes safety decisions consistent.
Step 9: Test your checklist for one week, then improve it
Do not aim for perfection on day one. Pilot the checklist for one week. At the end of the week, ask three questions:
Also look at the data. If pressure readings drift upward every week, that may tell you filter change intervals should be adjusted. The checklist becomes smarter as you use it.
Final thoughts: a checklist is a training tool, not just a form
A good paint booth maintenance checklist creates shared habits. It makes new staff more confident, protects finish quality, and helps you spot trouble early. Keep it short, make each item measurable, and match it to how your shop actually runs . Once your team sees that the checklist prevents rework and surprise downtime, it stops feeling like paperwork and starts feeling like part of producing a clean, consistent finish. If you want, share your booth type (downdraft, crossdraft, prep station, combo) and whether you track pressure readings today, and I can draft a ready to print checklist layout tailored to that setup.