
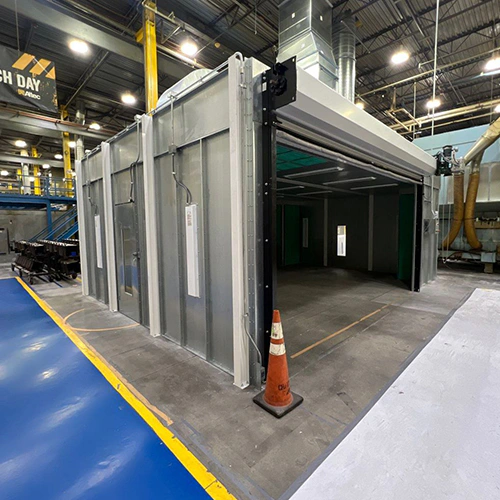
Poor visibility in a spray booth usually signals a hardware problem, but jumping straight to an LED retrofit often targets the wrong variable. Before swapping fixtures or purchasing retrofit tubes, a shop must determine whether the issue stems from degraded lamps, clouded protection films, contaminated air filters reducing enclosure clarity, or improper fixture positioning. Upgrading to LED requires matching the electrical, mechanical, and safety certifications of your existing booth rather than simply chasing raw output.
Diagnose the Visibility Problem Before Purchasing Hardware
A drop in booth illumination does not automatically mean your existing light technology is obsolete. Overspray accumulation on glass lenses, deteriorated lens protectors, or aging lamps and ballasts can reduce useful illumination.
Start by isolating maintenance failures from capacity limits. Inspect the condition of fixture glass, door lenses, and corner light assemblies. If cleaning the glass and replacing protective films according to your manufacturer maintenance instructions restores clear sightlines across your workpieces, your fixtures may still deliver their intended performance. Similarly, check booth intake and exhaust filtration; choked filters build up ambient overspray haze during active spraying, mimicking dim illumination. Standard paint booth light maintenance should always precede capital upgrades.
If the fixtures are clean, the air is clear, and painters still struggle with heavy shadows on lower rocker panels or glare along horizontal hoods, evaluate your work-plane coverage. Swapping to a brighter lamp inside an improperly angled fixture will only intensify glare without filling the shadow zones. Note the exact failure points during production:
- Are painters having trouble checking metallic flake orientation on vertical sides?
- Are shadows falling under bumpers because lower hip or waist-level fixtures are absent?
- Are lamps flickering or exhibiting color shift due to aging internal ballasts?
Document these specific pain points. They dictate whether you need an OEM-approved lamp upgrade within your existing housings or a physical reconfiguration of fixture placements.
Verify Fixture and Booth Compatibility
Spray-area electrical requirements depend on the location and equipment configuration. Treat commercial LED tubes, magnetic-strip retrofit kits, and replacement fixtures as compatibility questions for the manufacturer and qualified electrical reviewer before installation.
Collect the data plate information from every fixture housing inside the cabin. This includes the fixture manufacturer, model number, voltage rating, ballast part number, and the hazardous location markings (such as Class I, Division 2 groups). OEM retrofit options are precise. For example, Global Finishing Solutions (GFS) specifies linear T8 LED retrofit lamps exclusively for designated GFS light fixtures, maintaining separate part numbers for specialized seals, tempered glass, and hazardous-location housings. That approval does not grant permission to insert those same LED tubes into third-party housings, nor does it allow using generic aftermarket tubes in GFS booths.
Review the fixture’s wiring configuration with a licensed electrician or qualified booth technician. Some certified retrofits operate directly on existing electronic ballasts (Type A), others require line-voltage direct wiring (Type B), and some utilize external drivers (Type C). Re-wiring a classified fixture body without manufacturer documentation and certified components can void the fixture's listing and compromise its vapor seal. Always demand manufacturer-approved LED compatibility documentation before issuing a purchase order for replacement lamps or conversion kits.
Evaluate Work-Surface Performance Over Raw Output
Raw lumen output at the lamp face does not correlate directly with defect detection on a fresh clearcoat. A high-lumen, point-source LED can produce extreme pinpoint glare that blinds the painter to run patterns and dry spray, while leaving dark recesses beneath panel edges.
Evaluate potential upgrades based on light distribution at the panel surface rather than center-beam intensity. The goal is even, diffuse illumination across horizontal hoods, curved fenders, and low rocker panels. While overall fixture placement is dictated by your broader paint booth lighting setup, the distribution profile of the replacement lamp must complement the fixture's internal reflector. High-quality spray booth LEDs use diffused lenses or specialized optics to spread light evenly, reducing the intense zebra-striping or micro-shadows often caused by bare surface-mount diodes.
Thermal tolerance is equally critical. Heated cure or bake cycles can expose lighting components to elevated temperatures. Request the proposed assembly’s operating-temperature data and have the manufacturer confirm suitability for the actual fixture location and booth operating profile.
Plan System Integration, Compliance, and Acceptance
Upgrading booth lighting is not a standalone electrical project; it interacts directly with ventilation, interlocks, and code compliance. For covered operations, OSHA 29 CFR 1910.107 addresses lighting isolation, electrical equipment and ventilation. The required arrangement depends on where the equipment is located and how the spraying area is separated.
Have the qualified reviewer identify the required interlocks for your booth and confirm that the upgrade preserves them. A lighting-lens interlock and an airflow-proving interlock perform different jobs; do not assume every fault must switch off the lights. If your upgrade involves replacing entire fixture assemblies or modifying control wiring, review your control panel schematics. Modern automated booths rely on equipment-specific control guidance to manage air-purge intervals, damper sequencing, and cycle-specific lighting states. Disrupting these control loops during an electrical changeout can trigger system faults or prevent the burner from firing.
To ensure your installation aligns with spray finishing requirements, establish a task-based acceptance routine before signing off on the work:
- Enclosure Integrity: Verify that every fixture door frame, tempered glass panel, and perimeter gasket is seated correctly. Damaged or pinched neoprene/silicone seals allow overspray to penetrate the fixture housing, coating electrical components and creating a fire hazard.
- Operational Interlocks: Have qualified personnel verify the required interlocks against the equipment documentation and confirm the documented lighting behavior in each applicable operating mode.
- Visual Task Assessment: Place a test vehicle or panel array in the cabin. Inspect metallic basecoats and clearcoats from realistic operator viewing angles—specifically checking for color consistency across panel joints and visibility on low-hanging surfaces.
- Electrical Verification: Have the installing electrician measure circuit current and confirm that running amperages match engineered nameplate values. Record these baseline power figures alongside running hours to establish an accurate operating profile.
Prepare Your Equipment Details
Executing a compliant, high-visibility lighting upgrade requires precise hardware identification rather than generic assumptions. Before sourcing replacement components, assemble your equipment baseline:
- Booth manufacturer, model number, serial number, and year of manufacture.
- Clear photographs of the fixture data plates inside the booth.
- Current lamp types (e.g., 32W T8 fluorescent, 4-lamp or 6-lamp configuration) and line voltage (120V, 277V, or 480V).
- Booth operating profile, noting whether the cabin runs ambient-only cycles or heated bake cycles with maximum cabin temperatures.
- Specific panel locations where painters currently experience poor visibility or heavy shadowing.
With this data in hand, you can define an upgrade path that preserves safety ratings and improves finishing accuracy. Contact Paint Booth to submit your equipment details and Request a Quote to discuss suitable lighting components for your booth.